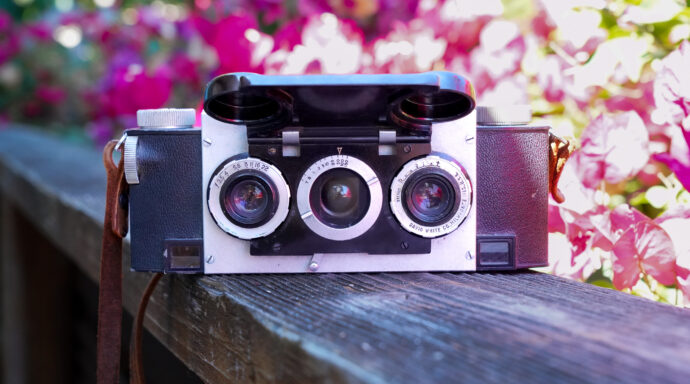
No special glasses, no app, no headset. Just your eyes and a little practice. This is called “free-viewing.” If you ever taught yourself to see one of those Magic Eye posters, you already have the exact skill this takes. Below are the two methods, why they aren’t interchangeable, and how to get your eyes to cooperate the first time.
Free-viewing vs Assisted Viewing
There are two broad ways to see a stereo pair in 3D. Free-viewing means using nothing but your own eyes, training them to fuse the two images on their own. Assisted viewing means letting a device do the work for you: a Victorian stereoscope, a View-Master, my Stereo Realist viewer, even your phone tucked into a cheap cardboard VR headset. This page is mostly about free-viewing, since it takes zero equipment and it’s free, but if a pair won’t cooperate, a viewer is always the easy button.
The two free-viewing methods
Free-viewing comes in exactly two flavors: parallel and cross-eyed. Parallel means relaxing your eyes as if you’re staring through the image into the distance. Cross-eyed means crossing your eyes in front of it. Same goal either way (getting each eye onto its own photo) just approached from opposite directions. The rest of this page walks through both.
Why the two methods aren't interchangeable
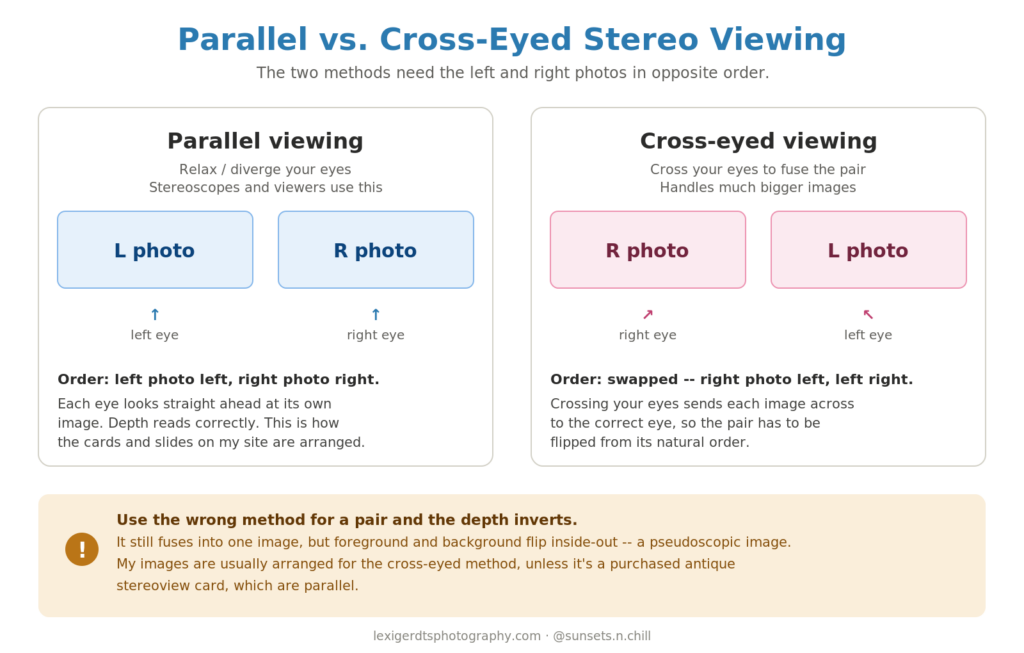
Before the how-to, one thing that trips up almost everyone: a stereo pair is really two photos (a left-eye view and a right-eye view) and for the 3D to look right, each of your eyes has to end up seeing its own photo.
Parallel viewing keeps the photos in their natural order, left photo on the left and right photo on the right, because each eye looks straight ahead at the image in front of it. That’s also how every physical viewer works, from a Victorian stereoscope to a View-Master to my Stereo Realist viewer.
Cross-eyed viewing flips your eyes across each other, so the photos have to be swapped — right photo on the left, left photo on the right — to land on the correct eye.
Here’s why it matters: if you use the wrong method for how a pair is arranged, it will still fuse into one image, but the depth comes out backwards. Foreground and background flip inside-out. That’s called a pseudoscopic image, and once you’ve seen a scene turn itself in the wrong direction, you can’t unsee it.
Most 3D photos I’ve personally shot are arranged for the cross-eyed method. Any antique cards I’ve bought are pre-arranged for parallel viewing, the way they came.
Which method should you use?
Here’s my honest take: unless you’ve got a stereoscope or some kind of viewer sitting on your desk, learn the cross-eyed method. It works with nothing but your eyes (no device, no help needed at all) as long as you can train your eyes to “see” it. That makes it the practical choice on a screen or a phone, and it’s the method that any modern stereoscopic photo probably (hopefully) uses. Parallel viewing is gentler on your eyes and looks more natural, but it only free-views cleanly at the right size, and since screens render things differently across browsers and devices, I vote cross-eyed.
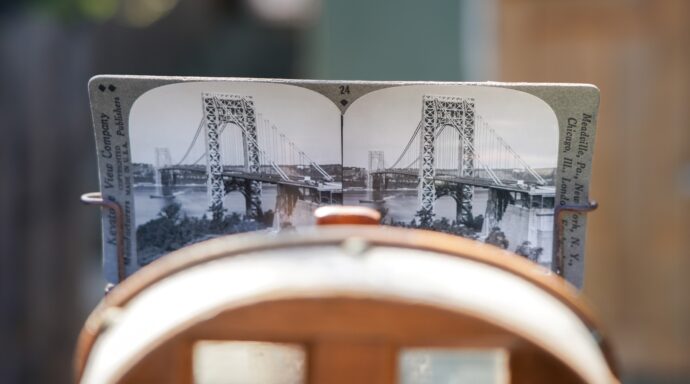
Parallel isn’t the lesser method, though, it’s how this whole art form started. Back in the Victorian era, people viewed cards through stereoscopes they kept in their parlors, which is exactly why most antique cards are printed for parallel viewing. A stereoscope isn’t a nice-to-have for those cards, it’s usually required: its magnifying lenses let your eyes relax as if you’re looking at the horizon, and its prisms nudge the two images together so they fuse. So a full-size parallel card really does want a viewer, while a small on-screen pair you can free-view.
If you’re a stereoscope enthusiast, or you shoot 3D yourself and have a viewer on hand, you’re not stuck with cross-eyed. You can print modern images as parallel cards for your viewer by arranging the pair in parallel order — left image on the left, right image on the right — the way a stereoscope expects them. Parallel is easier on the eyes, if you have issues with the cross-eyed method.
One troubleshooting note: if you’re trying the cross-eyed method and the depth looks inverted or the image just won’t come out right, the pair may be arranged backwards for you, meaning it’s set up for parallel, not cross-eyed.
For my stuff specifically: the modern photos I shoot are arranged cross-eyed, so you can free-view them right here on the screen. My antique cards are parallel-arranged at full card size, so they’re best seen through a stereoscope, or shrunk down small enough to free-view.
How To View:
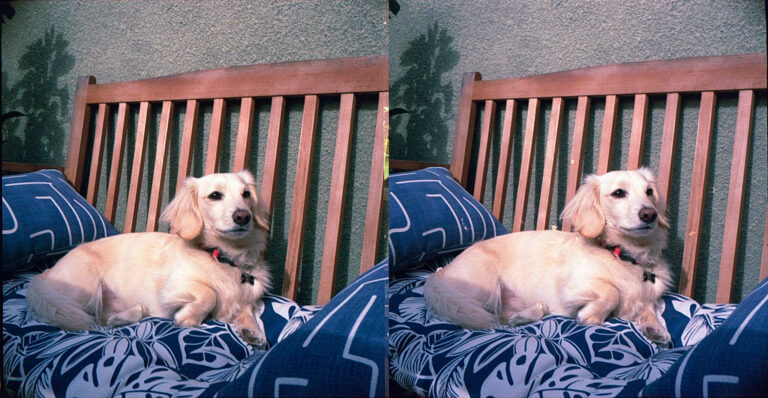
The cross-eyed method:
- Hold the image close and put a finger in front of it. Focus on your finger.
- Slowly cross your eyes until you see two fingers.
- Keeping your eyes crossed, move your gaze to the image.
- The two halves overlap in the middle and the 3D effect appears.
Cross-eyed viewing handles much bigger images than parallel does, which is its main advantage. The tradeoff is the arrangement issue above — it wants the pair swapped.
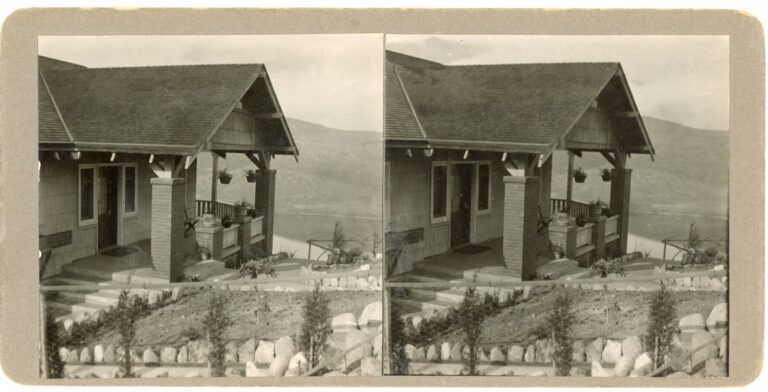
The parallel viewing method:
- Get close. Hold the image right up to your face, almost touching it.
- Relax your eyes. Look at the image but un-focus, like you’re staring at something far behind it.
- Slowly pull it away while keeping that relaxed, staring-through focus.
- You’ll see blurry, doubled shapes at first. That’s normal.
- Keep holding the focus until the shapes snap together and the 3D image appears.
One catch with parallel viewing: it only works comfortably when each half of the pair is about as wide as the space between your eyes, or narrower. That’s why big images are hard to parallel-view and why people reach for the cross-eyed method on larger prints and screens.
A rough rule of thumb from the stereo world: when the two images in a pair sit about 66mm apart (roughly the space between an adult’s eyes) you can free-view them with no device at all, either method. Antique stereoview cards are usually printed a bit wider than that, around 77mm, which lands just past what most people can free-view in parallel. That’s exactly why the Holmes stereoscope exists — the handheld viewer with the prism lenses you always spot in antique shops. Its lenses do the work your eyes can’t, fusing that slightly larger card for you. Go bigger still and you’re into specialty gear like a mirror stereoscope. On a screen, you can sidestep the whole thing by shrinking the image down small, or just reaching for the cross-eyed method.
Tips for your first time
A few things that make this click faster:
- Be patient. Almost nobody gets it on the first try, and then one day it just snaps and you wonder how you ever couldn’t.
- Start with high-contrast photos. Bold light-and-dark images are far easier for beginner eyes to fuse than soft, faded ones.
- View with a plain background. Clutter behind the image makes it harder for your eyes to settle.
- Desktop: Don’t zoom in too far. View the image at its normal size for the best result.
- Phone: Turn your device sideways. When the image rotates to landscape and fills most of the screen, it gives your eyes a bigger, clearer target to work with, and the whole thing gets noticeably easier.
- Take breaks. If your eyes get tired or strained, stop and come back later. This should feel like a mild stretch, not a headache.
Still not working?
If the image doubles but won’t fuse, you’re closer than you think — your eyes are just overshooting or undershooting the overlap. Pull the image slowly toward and away from your face to find the exact distance where the two halves click together.
If it fuses but looks flat, you may be viewing at a size or distance that’s flattening the effect. Try getting closer, or switch methods.
If it fuses but the depth looks wrong — things that should be near look far, or the scene feels turned inside-out — you’re using the method the image isn’t arranged for. Switch from cross-eyed to parallel (or vice versa) and it should pop the right way.
Keep exploring
Now that you can see them, go put it to use. Browse my antique stereograph card collection or my modern stereoscopic film photography, or head back to the Stereoscopic 3D home for everything in one place.